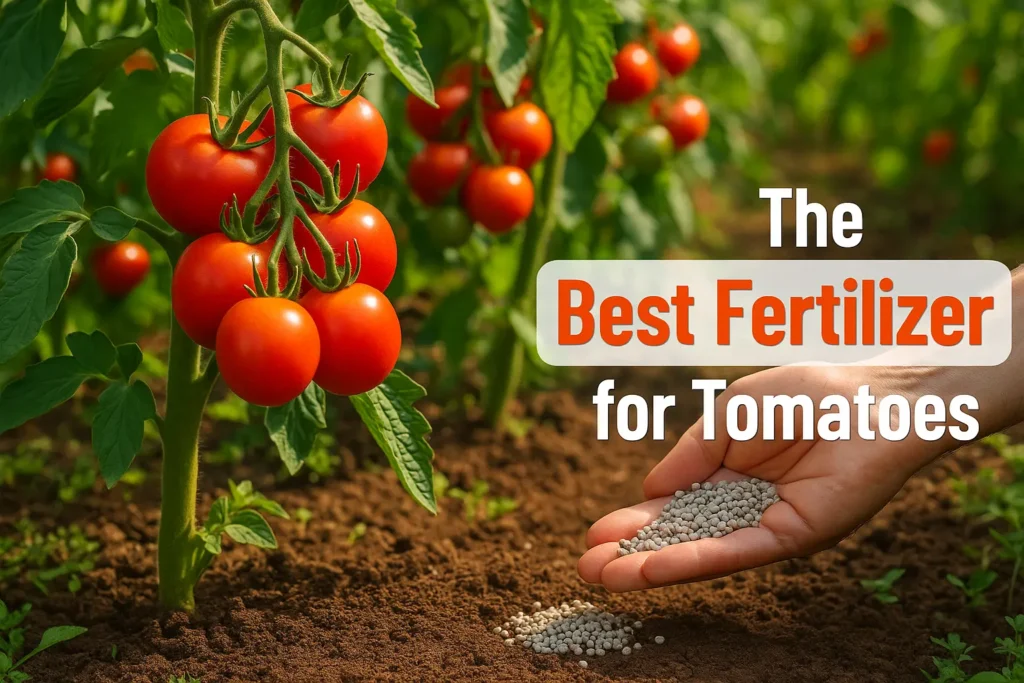
The best fertilizer for tomatoes in 2026 is one that balances nitrogen, phosphorus, and potassium while supporting strong roots and heavy fruiting.
Tomatoes need steady feeding—not guesswork.
Start with a balanced fertilizer (like 10-10-10) at planting, then switch to a lower-nitrogen, higher-phosphorus blend once flowering begins.
Feed every two weeks and water consistently to avoid nutrient stress.
The right formula, applied at the right stage, makes all the difference in yield and flavor.
When I first started growing tomatoes in my backyard garden, I was overwhelmed by the fertilizer options.
Organic or synthetic? Liquid or granular? Nitrogen-heavy or balanced?
After years of experimentation and plenty of tomato harvests ranging from disappointing to spectacular, I’ve learned that choosing the right fertilizer makes all the difference between mediocre and magnificent tomatoes.
Key Takeaways
- Balanced NPK ratios are crucial for tomatoes, with a preference for formulations higher in phosphorus (the middle number) to promote flowering and fruiting.
- Organic fertilizers like compost, worm castings, and fish emulsion provide slow-release nutrients and improve soil health, while synthetic fertilizers deliver immediate results but require careful application.
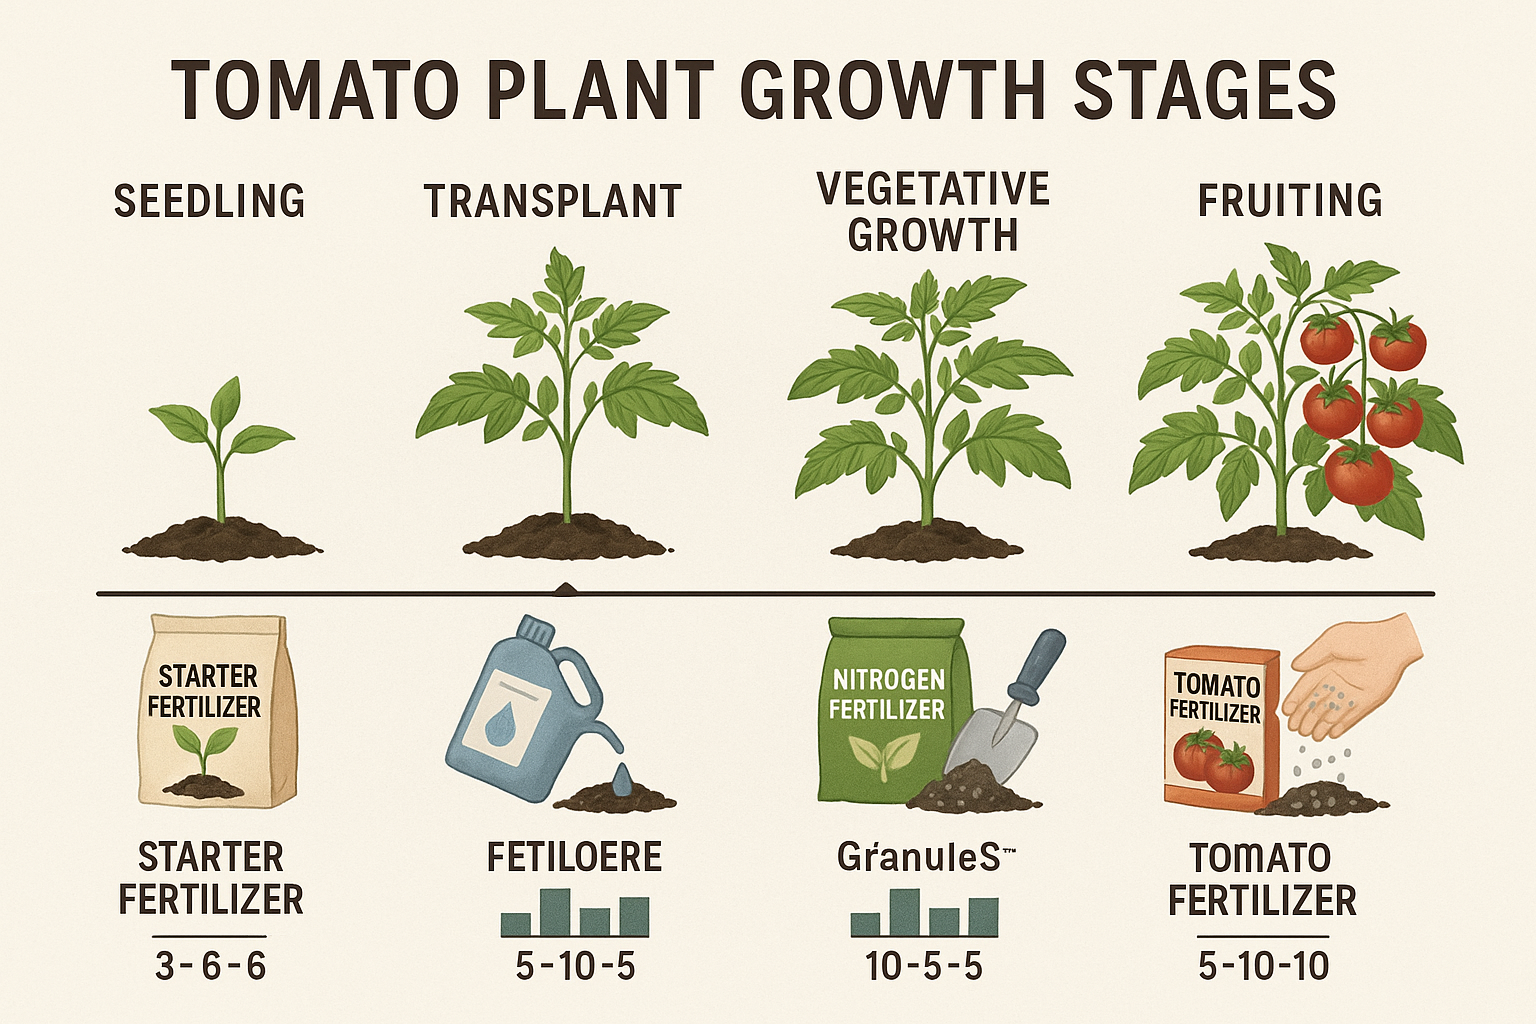
- Timing matters significantly – use different fertilizers at planting time (phosphorus-rich) versus during growth and fruiting stages (more balanced formulations).
- Calcium supplementation is essential for preventing blossom end rot, one of the most common tomato growing problems.
- Soil testing before fertilizing helps prevent over-fertilization, which can lead to lush foliage but poor fruit production.
Understanding Tomato Nutrient Needs
Before diving into specific fertilizers, it’s essential to understand what tomatoes actually need to thrive.
These hungry plants have distinct nutritional requirements that change throughout their growing cycle.
The NPK Ratio Explained
When you pick up any fertilizer, you’ll notice three numbers prominently displayed on the package – this is the NPK ratio, representing the percentage by weight of Nitrogen (N), Phosphorus (P), and Potassium (K).
- Nitrogen (N): Promotes leafy, vegetative growth. Too much nitrogen results in beautiful, bushy plants with few tomatoes.
- Phosphorus (P): Essential for root development, flowering, and fruit production – the primary goal when growing tomatoes.
- Potassium (K): Improves overall plant health, disease resistance, and helps regulate water uptake.
For tomatoes, the ideal NPK ratio shifts depending on the growth stage.
At planting time, phosphorus is crucial for establishing strong roots, so formulations like 5-10-5 or 5-10-10 work well.
Once plants are established, a more balanced ratio like 5-5-5 or 6-6-6 supports steady growth and fruit production.
Secondary Nutrients and Micronutrients
While NPK gets the spotlight, tomatoes also require several other nutrients:
- Calcium: Prevents blossom end rot, that frustrating black spot on the bottom of tomatoes
- Magnesium: Essential for chlorophyll production and photosynthesis
- Sulfur: Helps with protein formation and enzyme activity
- Micronutrients: Including iron, manganese, zinc, copper, boron, and molybdenum – all needed in tiny amounts but critical for plant health
In my early gardening days, I focused exclusively on NPK and couldn’t figure out why my tomatoes still developed blossom end rot despite regular fertilizing.
It wasn’t until I addressed calcium deficiency specifically that my harvests improved dramatically.
The Role of Soil pH
Fertilizer effectiveness is directly tied to soil pH.
Tomatoes prefer slightly acidic soil with a pH between 6.0 and 6.8. At this range, nutrients are most available to the plants.
When I moved to a new home with alkaline soil (pH 7.5), my tomatoes struggled despite regular fertilizing.
After adjusting the pH with sulfur and switching to fertilizers formulated for alkaline conditions, my plants flourished again.
Before applying any fertilizer, conduct a soil test to determine your baseline pH and nutrient levels.
Many county extension offices offer affordable testing services, or you can purchase home test kits.
This small step prevents wasteful over-fertilization and helps identify specific deficiencies.
Types of Tomato Fertilizers
The fertilizer aisle can be overwhelming, but understanding the basic categories helps narrow down your choices.
Organic Fertilizers for Tomatoes
Organic fertilizers derive from plant, animal, or mineral sources. They typically release nutrients slowly as soil microorganisms break them down.
Compost and Manure
Compost is my personal favorite foundation for tomato nutrition.
Well-aged compost provides a balanced mix of nutrients while improving soil structure and microbial activity.
Benefits of compost for tomatoes:
- Improves soil structure and water retention
- Provides slow-release nutrients throughout the season
- Enhances beneficial microbial activity
- Helps buffer soil pH
When using animal manures, ensure they’re fully composted (aged at least 6 months) to avoid burning plants and potential pathogen issues.
Chicken manure is particularly rich in nitrogen and phosphorus but needs thorough composting due to its high ammonia content.
Worm Castings
Worm castings (vermicompost) are a supercharged form of compost produced by earthworms.
With an NPK ratio of roughly 1-0-0, they seem low in nutrients but contain beneficial microbes and plant growth hormones that dramatically improve plant health.
I’ve conducted side-by-side tests with and without worm castings mixed into planting holes, and the difference is remarkable.
Plants with worm castings consistently produce earlier and more abundant harvests.
Fish Emulsion and Seaweed Extracts
These liquid organic fertilizers provide quick nutrient boosts during the growing season:
- Fish emulsion (typically 5-1-1) delivers nitrogen for growth spurts
- Seaweed extract provides growth hormones and micronutrients rather than NPK
- Fish and seaweed blends offer the benefits of both
The downside? The smell, particularly with fish emulsion, can be temporarily unpleasant.
I apply these early in the morning to minimize odor impact on outdoor activities.
Bone Meal and Blood Meal
- Bone meal (typically 3-15-0) provides phosphorus for root development and flowering
- Blood meal (typically 12-0-0) offers a nitrogen boost when needed
A handful of bone meal in each planting hole has become my ritual for tomato transplants, ensuring strong early root development and setting the stage for abundant flowering.
Synthetic Fertilizers for Tomatoes
Synthetic (also called chemical or inorganic) fertilizers are manufactured products with precise nutrient ratios.
They typically provide nutrients in forms immediately available to plants.
Water-Soluble Powders and Liquids
Products like Miracle-Gro Tomato Plant Food (18-18-21) dissolve in water for immediate feeding.
These work quickly to address deficiencies but require regular reapplication.
I keep water-soluble fertilizer on hand for “rescue operations” when plants show deficiency symptoms, but I don’t rely on them as my primary feeding method.
Slow-Release Granules
Slow-release synthetic fertilizers like Osmocote or Dynamite are coated to release nutrients gradually over 3-9 months. They offer convenience but less control over timing.
Tomato-Specific Formulations
Many manufacturers offer products specifically formulated for tomatoes, like:
- Espoma Tomato-tone (3-4-6 plus calcium)
- Dr. Earth Organic Tomato, Vegetable & Herb Fertilizer (4-6-3)
- Jobe’s Organics Vegetable & Tomato Fertilizer (2-5-3)
These typically feature:
- Higher phosphorus for flowering and fruiting
- Added calcium to prevent blossom end rot
- Balanced micronutrients specific to tomato needs
Hybrid Approaches
Many experienced gardeners, myself included, use a hybrid approach:
- Base nutrition: Compost and organic matter worked into soil before planting
- Planting boost: Bone meal or starter fertilizer in planting holes
- Maintenance feeding: Diluted organic liquid fertilizers during growth
- Targeted solutions: Specific amendments (like calcium) as needed
This approach provides steady nutrition while allowing adjustments based on plant performance.
The Best Fertilizers for Different Growth Stages

Tomato plants have different nutritional needs as they develop from seedlings to fruit-bearing plants.
Seedling Stage
Young tomato seedlings need minimal fertilization. In fact, over-fertilizing at this stage can damage tender roots.
Best options for seedlings:
- Diluted fish emulsion (¼ to ½ strength) applied weekly
- Worm castings mixed into seed-starting mix (10% by volume)
- Commercial seed-starting fertilizers at half strength
I learned this lesson the hard way after burning a tray of seedlings with full-strength fertilizer.
Start with less than you think you need – you can always add more, but you can’t undo fertilizer burn.
Transplanting Stage
When moving seedlings to their permanent location, focus on root development and minimizing transplant shock.
Best transplanting fertilizers:
- Bone meal (1-2 tablespoons per planting hole)
- Starter fertilizers with higher phosphorus (like 5-10-5)
- Mycorrhizal fungi products to enhance root development
- Diluted seaweed extract to reduce transplant shock
I prepare each planting hole with a handful of compost, a tablespoon of bone meal, and a sprinkle of mycorrhizal fungi powder.
This combination has dramatically reduced transplant shock in my garden.
Vegetative Growth Stage
Once plants are established and growing vigorously, they need balanced nutrition to build structure before fruiting.
Best fertilizers for vegetative growth:
- Balanced organic fertilizers (like 5-5-5)
- Compost tea applied biweekly
- Alfalfa meal or alfalfa tea (provides nitrogen and natural growth hormones)
Flowering and Fruiting Stage
When flowers appear, it’s time to shift nutrition to support fruit production.
Best fertilizers for flowering and fruiting:
- Formulations with higher phosphorus and potassium (like 3-5-7)
- Organic tomato-specific fertilizers
- Compost tea with added molasses to promote beneficial microbes
- Calcium supplements to prevent blossom end rot
During this stage, I reduce nitrogen to prevent excessive leaf growth at the expense of fruit production.
One summer, I continued high-nitrogen feeding throughout the season and ended up with jungle-like plants but disappointingly few tomatoes.
Preventing & Addressing Common Nutrient Deficiencies
Even with regular fertilization, tomatoes can develop specific nutrient deficiencies that require targeted intervention.
Blossom End Rot: The Calcium Connection
Blossom end rot appears as a dark, sunken spot on the bottom of tomatoes.
While often attributed to calcium deficiency, it’s frequently caused by inconsistent watering that prevents calcium uptake rather than lack of calcium in the soil.
Solutions for blossom end rot:
- Maintain consistent soil moisture with regular watering and mulch
- Apply calcium supplements like gypsum or crushed eggshells
- Foliar sprays with calcium chloride for immediate intervention
- Avoid excessive nitrogen, which can interfere with calcium uptake
After struggling with blossom end rot for years, I now add crushed eggshells to planting holes and maintain consistent soil moisture with drip irrigation and thick mulch.
These preventative measures have virtually eliminated the problem.
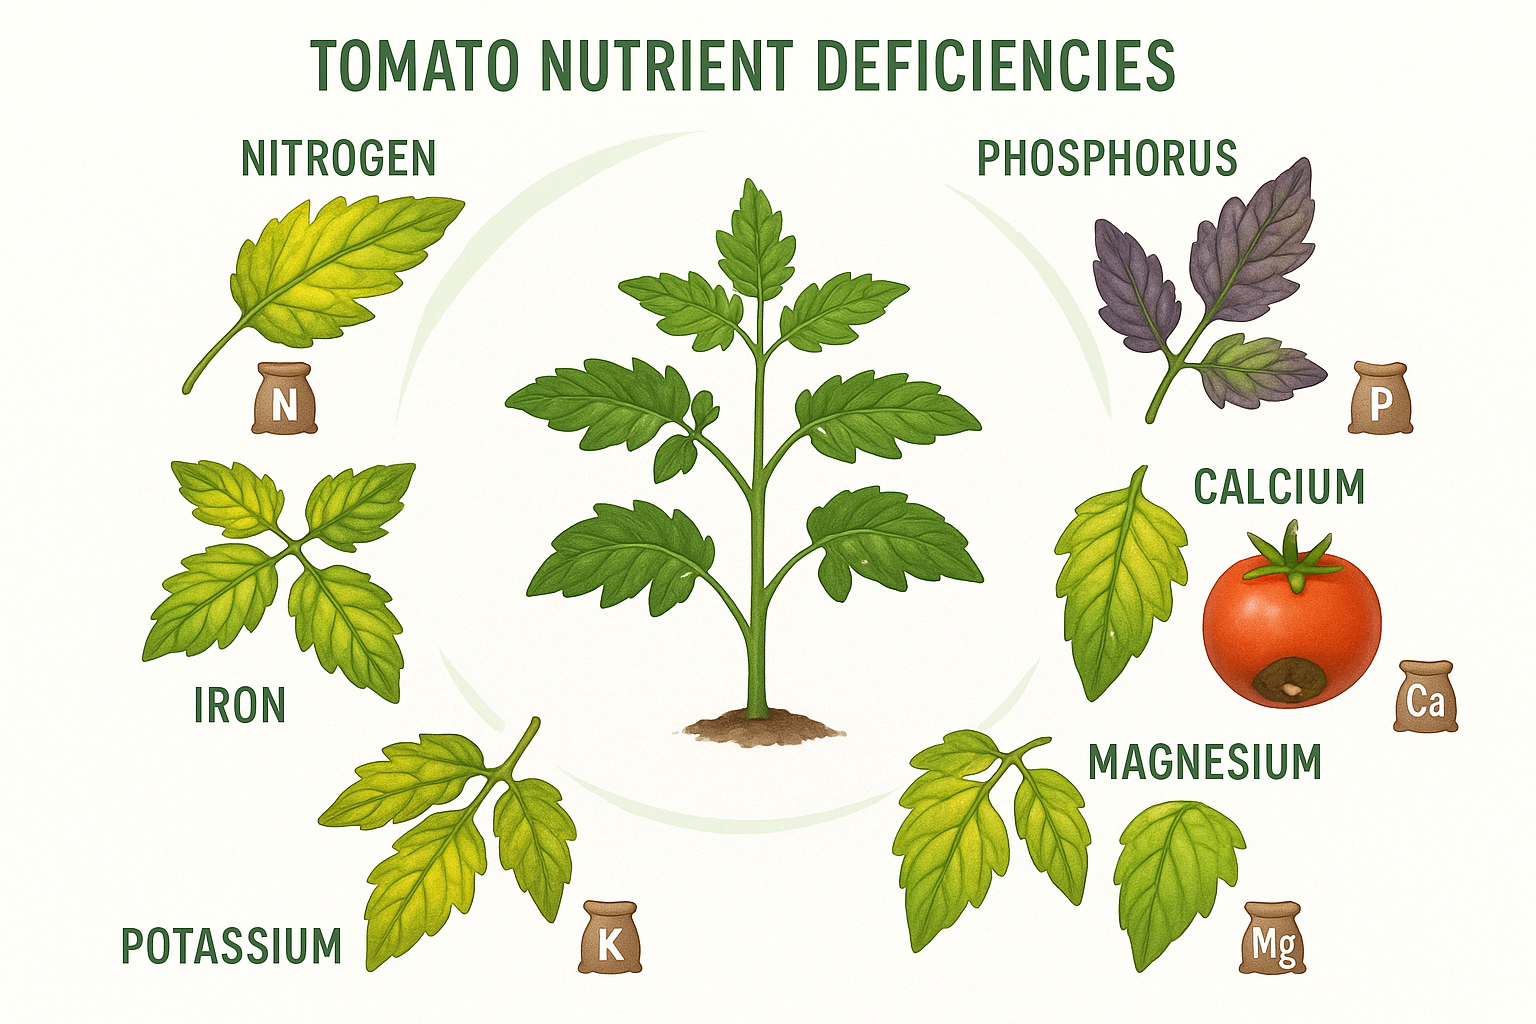
Yellowing Leaves: Multiple Culprits
Yellowing leaves can indicate several different nutrient issues:
- Uniform yellowing of older leaves: Likely nitrogen deficiency
- Yellowing between veins on older leaves: Magnesium deficiency
- Yellowing between veins on newer leaves: Iron deficiency
- Purple tint to leaves: Phosphorus deficiency
Solutions for yellowing leaves:
- Nitrogen deficiency: Blood meal or diluted fish emulsion
- Magnesium deficiency: Epsom salts (1 tablespoon per gallon of water)
- Iron deficiency: Iron chelates or acidifying the soil
- Phosphorus deficiency: Bone meal or rock phosphate
Stunted Growth and Poor Fruit Set
If plants look generally unhealthy with stunted growth and few fruits, consider these potential causes:
- Overall nutrient deficiency: Apply balanced fertilizer
- pH issues blocking nutrient availability: Test soil pH and adjust as needed
- Over-fertilization: Flush soil with plain water and reduce feeding
- Environmental stress: Address temperature, water, or light issues
Application Methods and Timing
How and when you apply fertilizer significantly impacts its effectiveness.
Soil Incorporation Before Planting
Working fertilizers into the soil before planting provides a strong foundation for the entire season.
Best pre-planting fertilizers:
- Compost (2-3 inches worked into top 6-8 inches of soil)
- Well-aged manure
- Complete organic fertilizers
- Rock minerals for long-term soil building
I prepare my tomato beds at least two weeks before planting, incorporating compost, a balanced organic fertilizer, and any amendments indicated by soil tests.
Base Dressing at Planting Time
Adding fertilizer directly to planting holes or trenches provides nutrients where young roots can access them immediately.
Effective planting time applications:
- Bone meal (1-2 tablespoons per hole)
- Starter fertilizers high in phosphorus
- Worm castings (handful per plant)
- Mycorrhizal fungi products
Side Dressing During Growth
Side dressing involves applying fertilizer to the soil surface around plants during the growing season.
Side dressing guidelines:
- Apply fertilizers in a ring around plants, staying 4-6 inches away from stems
- Water thoroughly after application
- Apply at 3-4 week intervals or according to product instructions
- Reduce nitrogen as plants begin flowering
Foliar Feeding for Quick Results
Spraying diluted nutrients directly on leaves provides quick absorption when plants need immediate help.
Effective foliar feeds:
- Seaweed extract
- Diluted fish emulsion (use filtered to prevent clogging sprayers)
- Calcium sprays for blossom end rot
- Compost tea
I use foliar feeding primarily as a supplement to soil applications or when plants show deficiency symptoms that need immediate attention.
Fertigation (Fertilizing While Watering)
Combining fertilization with irrigation ensures even distribution and reduces labor.
Fertigation options:
- Drip irrigation with fertilizer injectors
- Hose-end sprayers with diluted liquid fertilizers
- Self-mixing irrigation attachments
After investing in a simple fertilizer injector for my drip system, I’ve been able to maintain more consistent nutrition with less effort.
Organic vs. Synthetic: Making the Choice
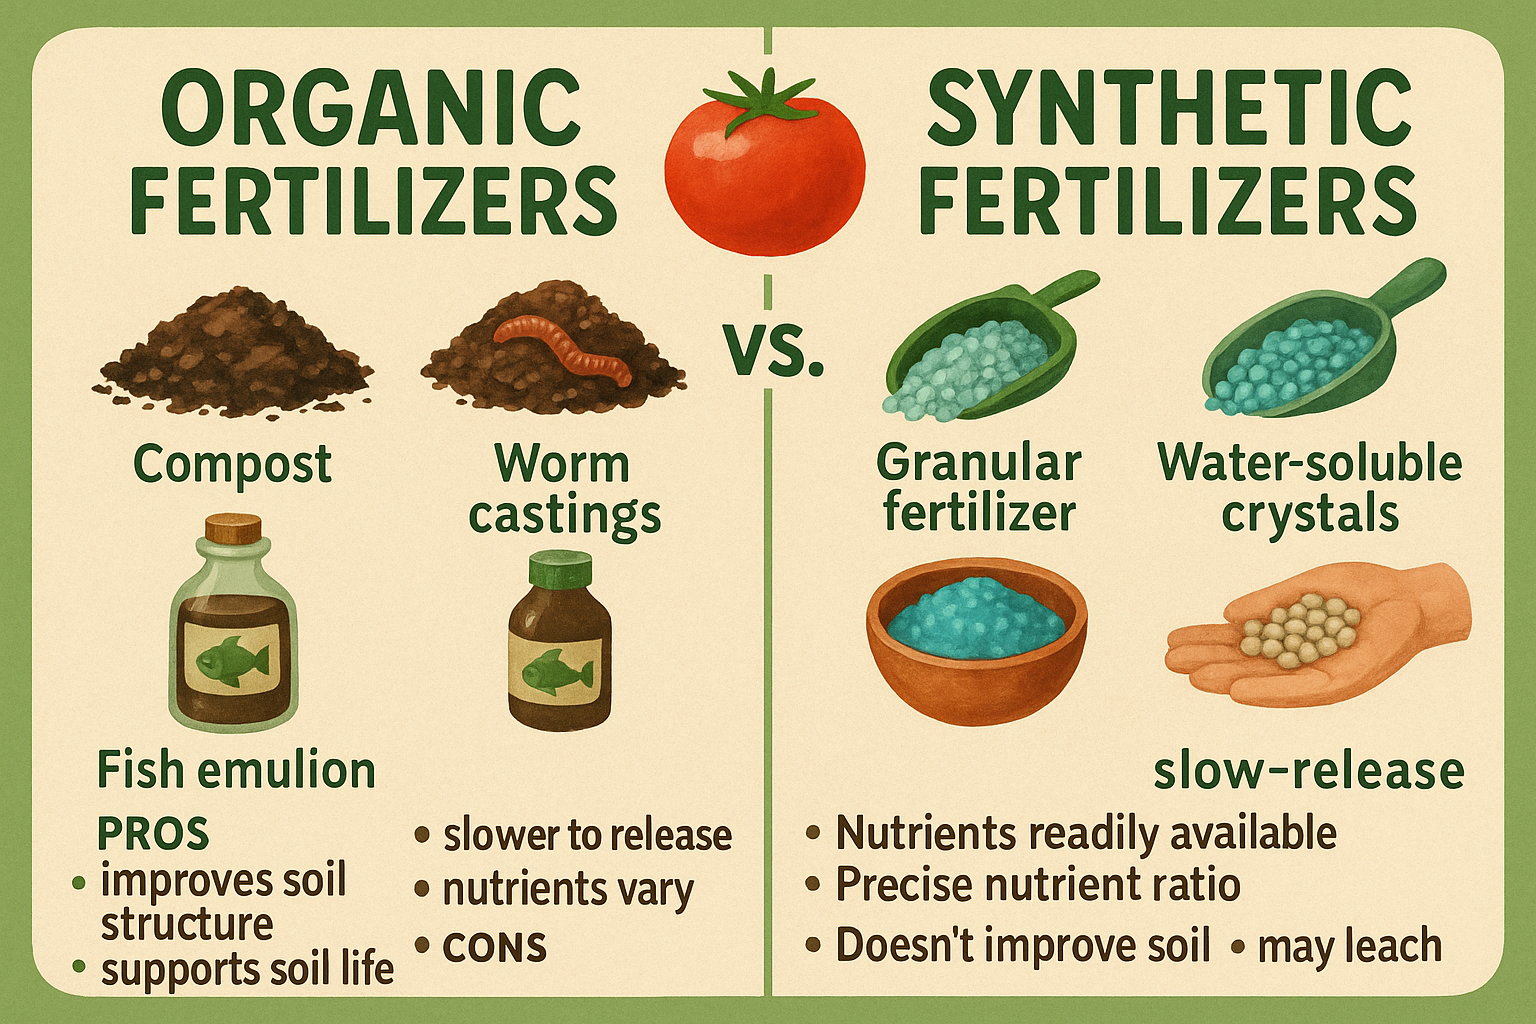
Both organic and synthetic fertilizers can produce excellent tomatoes, but they work differently and have distinct advantages.
Pros and Cons of Organic Fertilizers
Pros:
- Improve soil structure and microbial activity
- Release nutrients slowly, reducing burn risk
- Often provide micronutrients and beneficial compounds
- Generally more environmentally sustainable
- Many can be homemade or locally sourced
Cons:
- Slower to show results
- Nutrient content can be variable
- May be more expensive initially
- Some have strong odors (fish emulsion, manures)
- Require microbial activity to release nutrients
Pros and Cons of Synthetic Fertilizers
Pros:
- Provide immediate nutrient availability
- Precise NPK ratios for specific needs
- Generally less expensive per nutrient unit
- Convenient formulations (slow-release, water-soluble)
- Consistent results
Cons:
- Don’t improve soil structure
- Can burn plants if over-applied
- May contribute to water pollution through runoff
- Can harm soil microbial communities with heavy use
- Often petroleum-based and less sustainable
Finding Your Balance
Many gardeners, myself included, find a middle path works best. I primarily use organic methods for long-term soil building and plant health, but keep synthetic options available for specific situations.
For example, when a late spring cold snap stunted my tomato seedlings one year, a half-strength application of water-soluble synthetic fertilizer helped them recover quickly, after which I returned to my organic regimen.
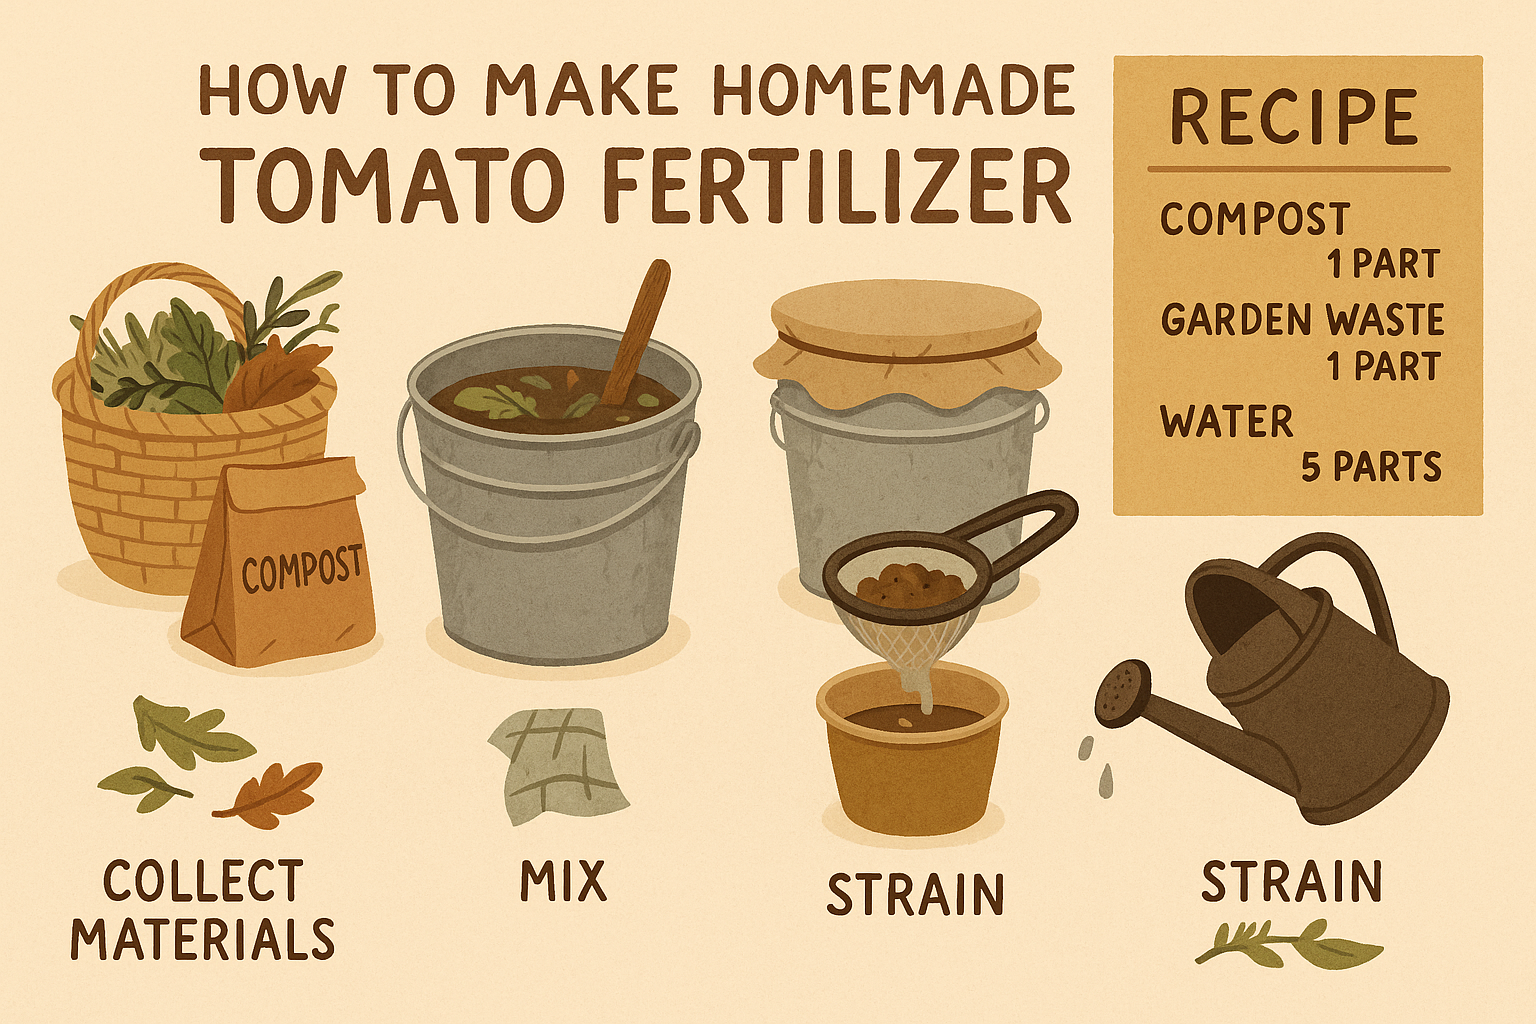
DIY Fertilizer Solutions
Store-bought isn’t the only option. Many effective tomato fertilizers can be made at home from readily available materials.
Compost Tea
Compost tea amplifies the benefits of compost by brewing a nutrient-rich liquid that can be applied as a soil drench or foliar spray.
Basic compost tea recipe:
- Fill a cloth bag with finished compost (about 1 cup per gallon of water)
- Submerge in a bucket of water
- Add 1 tablespoon molasses to feed beneficial microbes
- Aerate with an aquarium pump for 24-48 hours
- Strain and apply diluted 1:4 with water
Homemade Tomato Fertilizer Recipes
All-purpose organic tomato food:
- 4 parts seedmeal or cottonseed meal
- 1 part dolomite lime
- 1 part bone meal
- 1 part kelp meal
Apply ½ cup per plant when transplanting and again when flowering begins.
Quick calcium boost:
- 10 crushed eggshells
- 1 gallon water
- 1 tablespoon vinegar Steep for 2 days, strain, and use as a soil drench.
Banana peel fertilizer:
- Dry banana peels in the sun
- Grind into powder
- Work into soil around tomato plants (high in potassium)
Recycling Kitchen Waste for Garden Use
Many kitchen scraps make excellent tomato fertilizers:
- Coffee grounds: Add nitrogen and slight acidity
- Crushed eggshells: Provide calcium to prevent blossom end rot
- Fish tank water: Contains nitrogen and beneficial microbes
- Cooking water from eggs or vegetables: Contains leached nutrients
I keep a dedicated “tomato bucket” in my kitchen for collecting eggshells, coffee grounds, and banana peels, which gets composted together specifically for my tomato beds.
Common Fertilizing Mistakes to Avoid
Even experienced gardeners make fertilizing errors. Here are the most common pitfalls and how to avoid them.
Over-Fertilization
Too much fertilizer, especially nitrogen, leads to lush foliage but few tomatoes.
Signs of over-fertilization include:
- Excessive leafy growth
- Few flowers or fruits
- Leaf burn or yellowing
- White crust on soil surface
- Plant collapse in severe cases
Prevention:
- Follow package directions for application rates
- Use half the recommended amount when unsure
- Increase frequency rather than concentration
- Watch plant response and adjust accordingly
Poor Timing
Applying the wrong fertilizer at the wrong growth stage reduces effectiveness:
- High nitrogen during flowering diverts energy from fruit production
- Insufficient phosphorus at transplanting limits root development
- Late-season feeding can delay ripening
Solution: Match fertilizer type to growth stage:
- Phosphorus-rich at planting
- Balanced during early growth
- Higher potassium during fruiting
Neglecting Soil pH
Even perfect fertilizer won’t work if pH prevents nutrient absorption.
Prevention:
- Test soil pH before planting
- Adjust pH to 6.0-6.8 for optimal tomato growth
- Retest annually, as pH can change over time
- Choose fertilizers appropriate for your soil’s pH
Inconsistent Application
Sporadic feast-or-famine fertilizing stresses plants and reduces yields.
Solution:
- Develop a regular fertilizing schedule
- Use slow-release options for steady nutrition
- Mark calendar with fertilizing dates
- Consider fertigation for consistent delivery
Fertilizing Container Tomatoes
Container-grown tomatoes have special fertilizing needs due to limited soil volume.
Special Considerations for Potted Plants
Container plants face unique challenges:
- Nutrients leach away more quickly with watering
- Root space is limited for nutrient foraging
- Soil volume restricts the nutrient reservoir
- Temperature fluctuations affect microbial activity
Recommended Fertilizers for Container Tomatoes
Best options for container tomatoes:
- Slow-release granules mixed into potting mix
- Liquid fertilizers applied weekly at half strength
- Organic options like worm castings and compost tea
- Specialized container plant fertilizers
I grow cherry tomatoes in containers on my patio and have found that a combination approach works best:
slow-release fertilizer mixed into the potting soil at planting time, supplemented with weekly diluted liquid fertilizer once plants begin flowering.
Frequency Adjustments
Container tomatoes typically need more frequent fertilizing:
- Apply liquid fertilizers every 7-14 days (rather than 3-4 weeks for garden plants)
- Refresh slow-release fertilizers every 4-6 weeks
- Watch for signs of nutrient depletion (yellowing leaves, slowed growth)
- Flush containers monthly with plain water to prevent salt buildup
Seasonal Considerations for Tomato Fertilization
Climate and seasonal timing affect fertilization strategies.
Spring Planting Strategies
Early spring plantings face different challenges than summer plantings:
- Cooler soil temperatures slow nutrient release from organic materials
- Root development may be slower in cool conditions
- Seedlings are more vulnerable to fertilizer burn
Spring adaptations:
- Use transplant solutions with mycorrhizal fungi
- Incorporate quick-release and slow-release phosphorus
- Pre-warm soil with black plastic before planting
- Start with lower fertilizer rates until growth accelerates
Summer Maintenance Feeding
During peak growing season:
- Increase potassium to support heavy fruit production
- Monitor for signs of heat stress, which affects nutrient uptake
- Apply calcium supplements preventatively
- Maintain consistent soil moisture for nutrient availability
Fall Tomato Considerations
For fall tomato crops (common in warmer regions):
- Adjust timing to ensure harvest before frost
- Focus on quick-maturing varieties
- Use quick-release fertilizers for faster results
- Consider foliar feeding for immediate uptake
Living in a climate with hot summers, I’ve found that fall tomatoes often outperform spring plantings but require more attentive fertilization to produce before cold weather arrives.
Environmental Impact of Fertilizer Choices
Our fertilizer decisions affect more than just our tomato harvest.
Sustainable Fertilizing Practices
To minimize environmental impact:
- Apply only what plants can use
- Time applications before rainfall (but not heavy storms)
- Use slow-release formulations to reduce runoff
- Create buffer zones near water features
- Incorporate organic matter to improve nutrient retention
Reducing Runoff and Watershed Impact
Fertilizer runoff contributes to water pollution. Prevent this by:
- Using drip irrigation rather than sprinklers
- Applying fertilizers to soil, not hard surfaces
- Creating swales or rain gardens to capture runoff
- Mulching heavily to prevent erosion
- Avoiding application before heavy rain
Choosing Eco-Friendly Options
Some fertilizer choices are inherently more sustainable:
- Locally produced compost and manures
- Cover crops and green manures
- Plant-based fertilizers vs. animal-based
- Products with recyclable packaging
- Certified organic options
Expert Recommendations and Scientific Research
Let’s look at what research and experts suggest about tomato fertilization.
University Extension Service Findings
Agricultural extension services consistently recommend:
- Soil testing before fertilizing
- Split applications rather than single heavy doses
- Balanced nutrition rather than excessive nitrogen
- Calcium supplementation for blossom end rot prevention
- Attention to micronutrients, not just NPK
Recent Research Developments
Recent studies have highlighted:
- Benefits of beneficial microbes in organic fertilizers
- Importance of silicon for plant strength and stress resistance
- Timing of fertilizer application affecting tomato flavor development
- Impact of fertilizer choices on nutritional content of fruits
- Effects of climate change on nutrient needs and availability
Expert Consensus on Best Practices
Despite some differences in approach, experts generally agree on these principles:
- Start with good soil structure and organic matter
- Use phosphorus-rich fertilizers at planting
- Reduce nitrogen once flowering begins
- Provide consistent calcium
- Address deficiencies promptly with targeted applications
Troubleshooting Fertilizer Issues
Even with the best intentions, fertilizer problems can arise.
Here’s how to identify and fix common issues.
Identifying Nutrient Deficiencies vs. Diseases
Nutrient issues can mimic disease symptoms:
| Symptom | Possible Nutrient Issue | Possible Disease |
|---|---|---|
| Yellow leaves | Nitrogen deficiency | Viral infection |
| Purple leaves | Phosphorus deficiency | Fungal stress |
| Brown leaf edges | Potassium deficiency | Bacterial wilt |
| Black bottom on fruit | Calcium uptake issues | Not a disease |
| Stunted growth | Multiple deficiencies | Root disease |
The key difference: nutrient issues typically show patterns (affecting oldest or newest leaves uniformly) while diseases often show irregular patterns or spread over time.
Correcting Mid-Season Problems
If problems develop during the growing season:
- Identify the specific deficiency through visual cues and soil tests
- Apply targeted amendments for that specific issue
- Address any underlying causes (pH, watering practices)
- Consider foliar feeding for fastest results
- Adjust ongoing fertilization program
Recovery Strategies After Fertilizer Burn
If you’ve over-fertilized:
- Flush soil thoroughly with plain water (3-4 times soil volume)
- Remove damaged plant parts
- Hold off on additional fertilizer until plants recover
- Apply a light dose of balanced fertilizer once new growth appears
- Monitor closely for several weeks
Case Studies: Successful Tomato Fertilization
Let’s examine some real-world examples of effective fertilization strategies.
Commercial Tomato Grower Approaches
Commercial growers often use:
- Precise soil testing and custom fertilizer blends
- Fertigation through drip systems for consistent delivery
- Foliar testing to catch deficiencies before visible symptoms
- Rotation of different fertilizer types to address all needs
- Careful monitoring of electrical conductivity in soil
Home Gardener Success Stories
One memorable success story comes from my gardening friend Maria, who transformed her clay soil by:
- Adding 4 inches of compost annually
- Using cover crops during winter months
- Applying mineral amendments based on soil tests
- Brewing compost tea biweekly during growing season
- Using diluted molasses to feed soil microbes
Her tomato yields doubled within two years, and the flavor improvement was remarkable.
Another gardener I mentor, James, struggled with container tomatoes until switching to:
- A premium potting mix with mycorrhizal fungi
- Slow-release organic fertilizer mixed into the soil
- Weekly feeding with diluted seaweed extract
- Monthly Epsom salt application
- Consistent watering with self-watering containers
His cherry tomato production increased from a handful to several pounds per plant.
Comparative Results from Different Methods
In my own side-by-side tests:
- Plants with mycorrhizal fungi at planting outperformed those without
- Worm casting amendments produced sweeter tomatoes than synthetic fertilizers
- Foliar feeding showed benefits during stress periods but minimal impact otherwise
- Slow-release organic fertilizers produced more consistent results than frequent synthetic feeding
Specialized Tomato Fertilizing Scenarios
Different growing methods require adapted fertilization approaches.
Hydroponic Tomatoes
Growing tomatoes without soil requires:
- Complete nutrient solutions specifically formulated for hydroponics
- Regular monitoring of solution pH and electrical conductivity
- Frequent solution changes or adjustments
- Attention to micronutrients that would naturally be present in soil
- Different formulations for different growth stages
Organic Certification Requirements
For certified organic production:
- Use only OMRI-listed or similarly certified inputs
- Maintain detailed records of all amendments
- Focus on soil health rather than direct plant feeding
- Comply with pre-harvest intervals for applied materials
- Follow specific composting protocols for manures
Growing Tomatoes in Challenging Soils
For problematic soils:
Sandy soil strategies:
- Increase organic matter to improve water and nutrient retention
- Apply fertilizers more frequently in smaller doses
- Use slow-release formulations to prevent leaching
- Focus on building humus content for long-term improvement
Clay soil approaches:
- Add gypsum to improve structure without affecting pH
- Incorporate coarse organic matter to improve drainage
- Consider raised beds to overcome drainage issues
- Use liquid fertilizers for better distribution
Alkaline soil solutions:
- Choose acidifying fertilizers like ammonium sulfate
- Add elemental sulfur to gradually lower pH
- Use chelated micronutrients that remain available in high pH
- Grow in containers with controlled soil mix when pH is extremely high
Building Long-Term Soil Fertility for Tomatoes
While annual fertilization addresses immediate needs, building soil health creates sustainable fertility.
Crop Rotation Strategies
Rotating crops prevents nutrient depletion and pest buildup:
- Follow tomatoes with less demanding crops
- Plant legumes to fix nitrogen before tomato seasons
- Use deep-rooted crops to bring up nutrients from subsoil
- Allow periodic fallow periods with cover crops
I follow a four-year rotation in my garden beds, with tomatoes following legumes (beans, peas) that have fixed nitrogen in the soil.
Cover Cropping for Tomato Beds
Cover crops between tomato seasons:
- Add organic matter when turned under
- Prevent erosion and nutrient leaching
- Can fix nitrogen (legumes) or scavenge nutrients (grasses)
- Break pest and disease cycles
- Improve soil structure through root action
My favorite winter cover crop mix before spring tomatoes includes:
- Hairy vetch (nitrogen fixation)
- Winter rye (organic matter and nutrient scavenging)
- Crimson clover (nitrogen and beneficial insect attraction)
Building Microbial Soil Health
Healthy soil biology reduces fertilizer needs:
- Apply compost to introduce diverse microorganisms
- Minimize tillage to protect fungal networks
- Use plant-based mulches that feed soil life as they decompose
- Apply compost tea to boost microbial populations
- Avoid practices that harm soil life (excessive tilling, fungicides, leaving soil bare)
Conclusion
Choosing the best fertilizer for tomatoes isn’t about finding a single perfect product – it’s about understanding your plants’ changing needs throughout their lifecycle and responding appropriately.
The most successful approach combines:
- Starting with knowledge: Testing your soil and understanding your tomatoes’ needs
- Building a strong foundation: Preparing soil with organic matter and balanced nutrients
- Supporting each growth stage: Adjusting fertilizer type and application as plants develop
- Monitoring and responding: Watching for signs of deficiencies or excesses
- Thinking long-term: Building soil health for sustainable production
By following these principles, you’ll not only grow more tomatoes but also more flavorful ones, while building healthier soil for future gardens.
Whether you choose organic methods, conventional fertilizers, or a hybrid approach, consistent attention to your plants’ nutritional needs will reward you with a bountiful harvest.
Remember that regional differences, changing climate conditions, and new research findings continue to refine best practices for tomato fertilization.
Stay curious, experiment with different approaches in small sections of your garden, and keep learning from both successes and disappointments.
Happy growing, and may your tomato harvests be abundant and delicious!